
How to organize clients with tags
Requirements
- Available on: All plans
- Device access: Web & mobile browser
- Permission: Owner or Manager (any staff with the client-management permission)
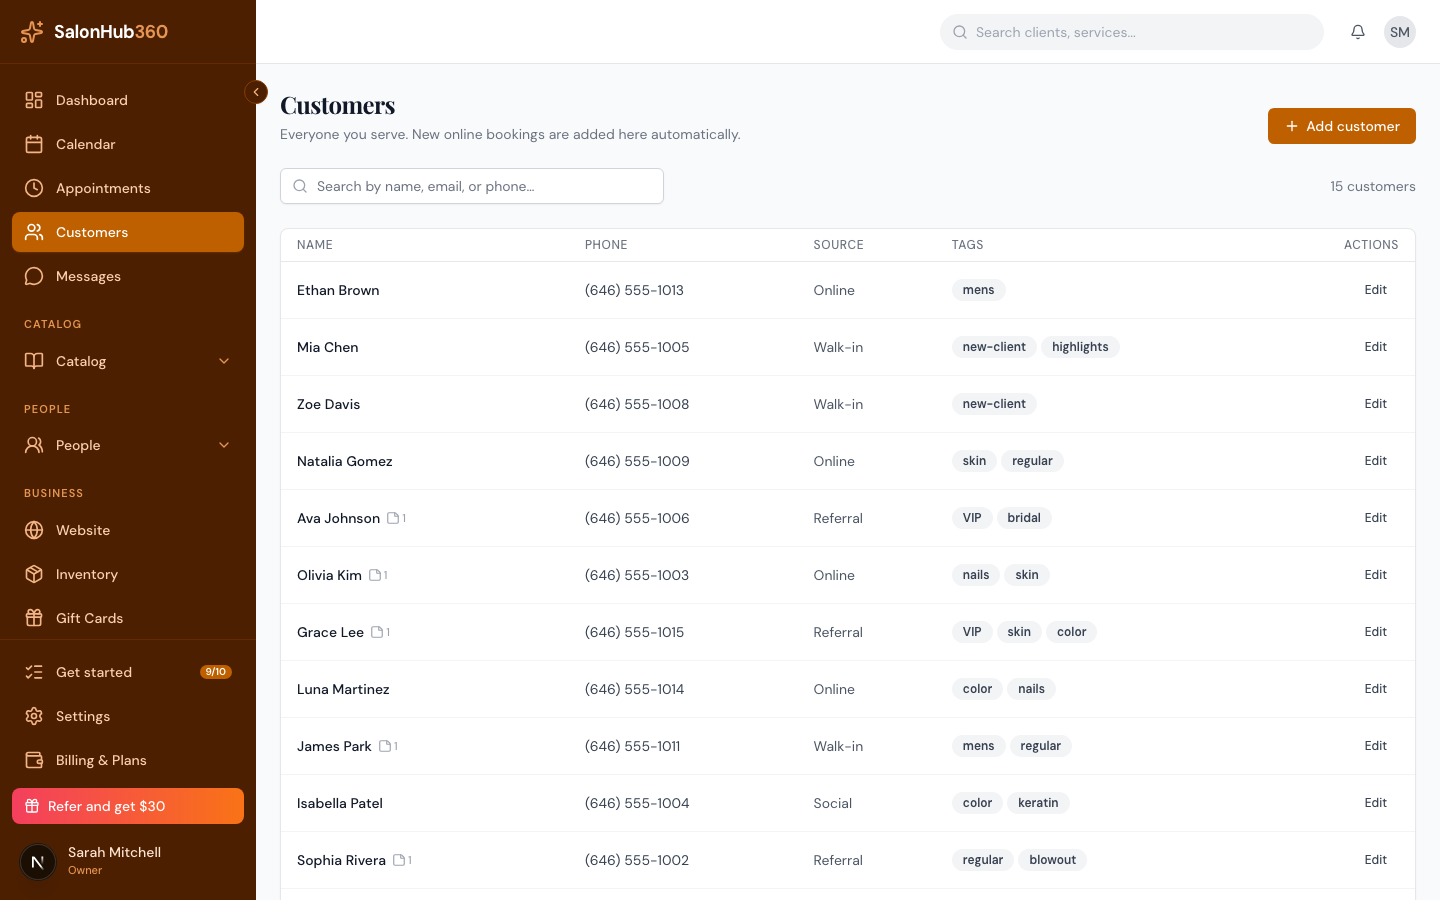
Tags are short, free-text labels — like VIP, new, or regular — that you attach to clients so you can spot them at a glance. Each client's tags appear as small badges on their row and at the top of their detail panel.
Where tags appear
- On the Customers list, the Tags column shows up to three of a client's tags.
- At the top of a client's detail panel, their tags appear as badges under their name.
This makes it easy to scan your list and immediately see who your VIPs and newest clients are.
How to add tags in bulk
The quickest way to apply tags across many clients at once is during a CSV import. The import template includes a tags column where you list each client's tags separated by a pipe character (|) — for example VIP|regular.
-
Go to Settings, then open the Import / Export tab.
<!-- CAPTURE: route=/settings?tab=import-export | login=owner | state=import tab | highlight=customer import section | viewport=1440x900 -->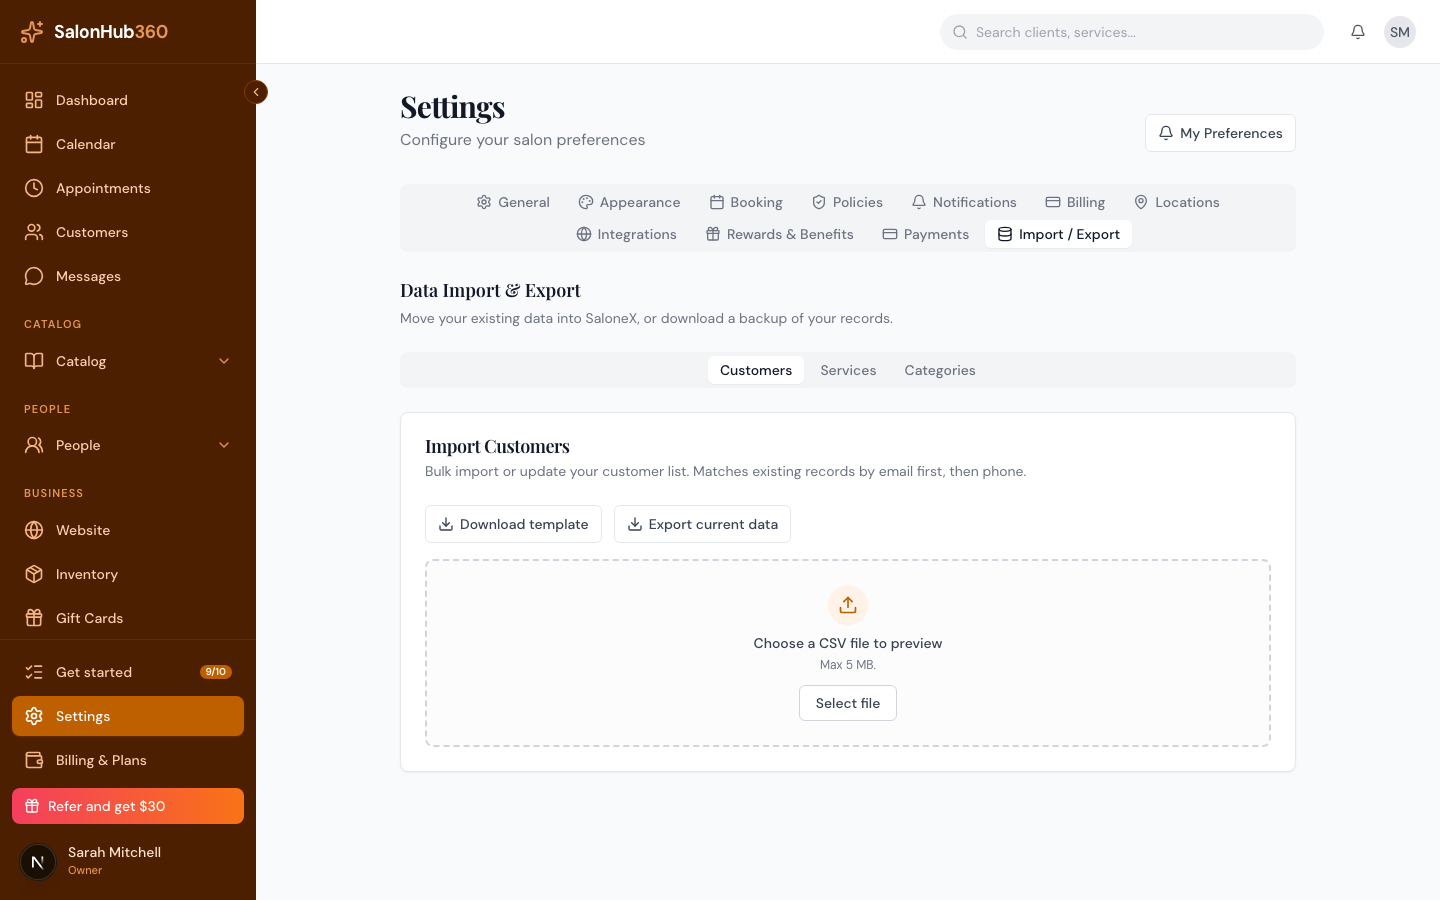
-
Download the customer template, add a tags value for each client (pipe-separated), and upload the file.
-
Imported clients arrive in your list already tagged.
Note: Importing clients is available on every plan, including Free. For the full walk-through, see Import your clients & services from a CSV.
Tip: Keep your tag names short and consistent (always "VIP", not sometimes "vip" or "V.I.P.") so the same group stays together. You can also export your client list to CSV to review every client and their tags in a spreadsheet.
Related articles